Click slide for next, or goto previous, first, last slides or back to thumbnail layout.

Click slide for next, or goto previous, or back to thumbnail layout.
Click slide for next, or goto previous, first, last slides or back to thumbnail layout.

Click slide for next, or goto previous, or back to thumbnail layout.
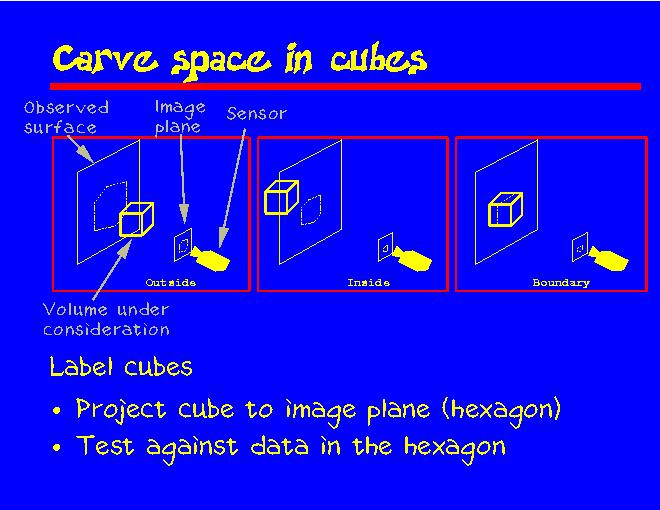
We carve the space a cube at a time. These images illustrate how we label a cube to be either inside, outside, or at the boundary of the object.
Here we have the sensor, the image plane of the sensor, the cube, and the object surface. First, we project the cube to the image plane of the sensor, where it forms a hexagon. Then we test the data within the hexagon. If all the data is behind the cube or belongs to the background, the cube is labeled outside. If all the data is in front of the cube, the label is inside. Otherwise we label the cube to be on the object boundary.