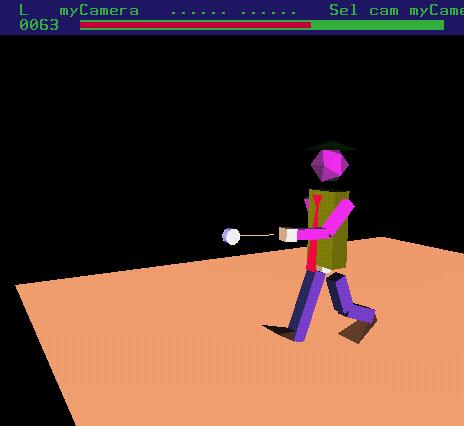
An articulated figure.
| Command-line switch | Arguments | Default value | Function |
|---|---|---|---|
| -help | None. | Not applicable. | Forces the moan executable to display a help screen, summarizing all command-line switches and interaction controls, and then terminate. |
| Key | Function |
|---|---|
| Escape | Terminates MOAN. |
| Command-line switch | Arguments | Default value | Function |
|---|---|---|---|
| -in | A string. | None; switch is mandatory. | Specifies the name of the input scene file. |
| -outs | A string. | The name of the input scene file. | Specifies the name of the output scene file. A warning is issued if the switch is omitted, in order to inform the user that the S key will overwrite the input file. |
If an incorrectly formatted scene file is supplied for input, MOAN will terminate, printing
| Key | Function |
|---|---|
| U | Re-reads the scene from the input scene file. MOAN attempts to retain the selection: when the new scene is loaded, the first (as encountered during a tree traversal) node of the new scene tree whose name is the same as the old selection's becomes the new selection, if any. |
| s | Saves the scene in a file whose name is formed by appending a period and a successively increasing three-digit integer (starting with 001) to the end of the output file name. |
| S | Saves the scene in the file whose name is the given output file name. |
The format of scene files is fully documented on these pages.
| Abbreviation | Selected node |
|---|---|
| No sel | None. |
| Sel cam | A Camera node. |
| Sel grp | A Group node. |
| Sel trn | A Joint Transformation node which encodes a translation. |
| Sel scl | A Joint Transformation node which encodes a scale. |
| Sel rot | A Joint Transformation node which encodes a rotation. |
| Command-line switch | Arguments | Default value | Function |
|---|---|---|---|
| -select | A string. | The name of the root node, if any. | Sets the initial selection to the scene tree node which has the given name, provided there is a path of named nodes leading from it up to the tree root. If multiple nodes meet this criterion, the first encountered during a tree traversal is selected. |
Within MOAN, the following keys change the selection:
| Key | Function |
|---|---|
| Right arrow | Moves the selection to the next named node on the same tree level and subtree, wrapping around if necessary. |
| Left arrow | Moves the selection to the previous named node on the same tree level and subtree, wrapping around if necessary. |
| Down arrow | If pressed when the selection is a group node, it moves the selection down to the first named node (if any) of the next lower level of the tree, but still within the same subtree. |
| Up arrow | Moves the selection to the next higher level of the tree, onto the parent of the selection (if any). |
MOAN can render the scene's primitives that have volume (i.e. all primitives but lines) as either
The following keys control the contents of the scene viewing area:
| Key | Function |
|---|---|
| c | If pressed when the selection is the secondary camera, it toggles
between single and double view mode.
Otherwise, if the selection is another camera, it becomes the secondary camera in double view mode. The selection may be subsequently modified without any impact on the viewing area (provided the key is not pressed again). Otherwise, the viewing area is configured to display a single view from the default camera. |
| w | Toggles the primitive rendering mode between solid and wireframe. |
The initial size of MOAN's viewing area is controlled by the following command-line switch:
| Command-line switch | Arguments | Default value | Function |
|---|---|---|---|
| -size | Two positive integers. | 800, 800 | Sets the initial viewing area width and height. |
Tip: In order to interactively view a scene from varying angles, place a Joint Transformation node near the root of the scene tree, and thus move the scene relative to the camera by editing the node. Even if interactive viewing is not desired, some transformation is necessary to move the scene away from the origin and place it within the viewing volume. Peruse the sample file primitives.sc to get acquainted with an application of such tricks.
| Command-line switch | Arguments | Default value | Function |
|---|---|---|---|
| -drate | One positive real number. | 0.01 | Sets the amount by which distance parameters change for every pixel the mouse moves. |
| -srate | One positive real number. | 0.01 | Sets the amount by which scale parameters change for every pixel the mouse moves. |
| -arate | One positive real number. | 0.3 | Sets the amount by which angle parameters change for every pixel the mouse moves. |
The table below lists which key (or activator ) the user must press in order to enable or disable editing of each parameter via the mouse's horizontal movement (fourth column), or vertical movement (fifth column).
| Node | Parameter | Category | Horizontal editing activator | Vertical editing activator |
|---|---|---|---|---|
| Joint Transformation encoding translation | X displacement | Distance | x | X |
| Joint Transformation encoding translation | Y displacement | Distance | y | Y |
| Joint Transformation encoding translation | Z displacement | Distance | z | Z |
| Joint Transformation encoding scale | X scale factor | Scale | x | X |
| Joint Transformation encoding scale | Y scale factor | Scale | y | Y |
| Joint Transformation encoding scale | Z scale factor | Scale | z | Z |
| Joint Transformation encoding rotation | Rotation angle | Angle | a | A |
| Joint Transformation encoding rotation | X component of rotation axis | Distance | x | X |
| Joint Transformation encoding rotation | Y component of rotation axis | Distance | y | Y |
| Joint Transformation encoding rotation | Z component of rotation axis | Distance | z | Z |
| Camera encoding either perspective or orthographic projection | Distance to the near clipping plane | Distance | n | N |
| Camera encoding either perspective or orthographic projection | Distance to the far clipping plane | Distance | f | F |
| Camera encoding perspective projection | Field of view | Angle | a | A |
Also, the following keys may be used to disable the editing of all parameters together:
| Key | Function |
|---|---|
| r | Disables editing via the mouse's horizontal movement. |
| R | Disables editing via the mouse's vertical movement. |
Finally, on the top line of MOAN's status bar, an indicator shows whether editing is enabled for each parameter of the selected node: either the corresponding activator appears, if editing is enabled, or a placeholder period (.) appears, otherwise.
| Mouse movement | Button pressed | Function |
|---|---|---|
| Right | Middle | Increases the value(s) of the parameter(s) subjected to horizontal editing. |
| Left | Middle | Decreases the value(s) of the parameter(s) subjected to horizontal editing. |
| Up | Middle | Increases the value(s) of the parameter(s) subjected to vertical editing. |
| Down | Middle | Decreases the value(s) of the parameter(s) subjected to vertical editing. |
The user may also wish to edit a Joint Transformation node not by manually modifying parameter value(s), but rather by requesting that the parameter values for the current animation frame be interpolated from nearby ones. In other words, the desired effect is to turn a keyframe into an in-between frame, for the selected node. This is achieved using the following key:
| Key | Function |
|---|---|
| Return | Toggles the keyframe status of the current animation frame for the selected node. It requires that the current animation frame is neither the first nor the last one. |
| Command-line switch | Arguments | Default value | Function |
|---|---|---|---|
| -frames | One integer strictly greater than 1. | 301 | Sets the total number of animation frames. |
The current animation frame is usually set using the mouse:
| Mouse movement | Button pressed | Function |
|---|---|---|
| None | Left | Sets the current animation frame so that the frame bar is filled up to the same horizontal window coordinate as the cursor's position, if possible. |
| Right | Left | Increases the current animation frame by one for every pixel the mouse moves, if possible. |
| Left | Left | Decreases the current animation frame by one for every pixel the mouse moves, if possible. |
More precise control over setting the current animation frame is achieved via the keyboard:
| Key | Function |
|---|---|
| k | Increases the current animation frame by one, wrapping around if necessary. |
| l | Decreases the current animation frame by one, wrapping around if necessary. |
| Key | Function |
|---|---|
| p | Commences animation playback in the forward (increasing animation frame) direction. When the last frame is reached, playback resumes automatically, starting with the first frame. If pressed during forward playback, it stops playback. |
| P | Commences animation playback in the reverse (decreasing animation frame) direction. When the first frame is reached, playback resumes automatically, starting with the last frame. If pressed during reverse playback, it stops playback. |
By default, MOAN renders the next frame as soon as the previous one has been displayed. It is possible, though, to configure MOAN to delay drawing the next frame until some minimum time interval has elapsed since the previous frame began rendering:
| Command-line switch | Arguments | Default value | Function |
|---|---|---|---|
| -delay | One non-negative real number. | 0.0 | Sets the minimum time interval between renderings of successive animation frames, in units of seconds. |
| Key | Function |
|---|---|
| i | Toggles the keyframe interpolation mode between linear and cubic. |
| Command-line switch | Arguments | Default value | Function |
|---|---|---|---|
| -outf | A string. | frame | Specifies the base name of the output frame files. |
To render the scenes onto disk, use the following key:
| Key | Function |
|---|---|
| M | Saves renderings of the scene, one per animation frame, in image files of PPM format. The names of these files are formed by appending a period, the frame number, and the string .ppm to the end of the specified base name of output frame files. |
Make sure that
while animation frames are written to disk.
As the frames are written to disk, the number of the frame currently processed appears on the terminal window, thus allowing the user to monitor MOAN's progress.
The PPM format is defined by the PBMPLUS (NETPBM) image libraries. PPM files are extremely easy to generate (and parse) - see MOAN's source code.