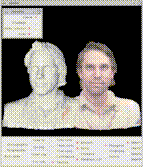
Plyview: a polygon viewing program

Plyview is an OpenGL viewer for interacting with polygonal datasets.
It presents both a graphical (Tk) and command line (Tcl) interface.
Plyview currently works only on triangle meshes and accepts files in
the "ply" and "Cyberware" formats. It is not bug-free, but it's
farily stable.
This web page contains sparse documentation and is currently under
construction.
Commands
The command interface is Tcl based for ease of scripting. The main
commands you need are "readply", "readcyb", and "writeply".
The readply command looks for all meshes of the form name.ply,
name_res2.ply, name_res3.ply, name_res4.ply. If they are not all
found, then it will give you the option of generating them. The
generation may take from seconds to minutes depending on the size of
the ply file, but the results are written to disk, and will be ready
for the next time you run plyview.
The readcyb command reads a cyberware file and any accompanying
texture map. With the "-head" option, readcyb creates a complete
tesselation, including any long skinny triangles. If a Cyberware
color file is also present, then readcyb will transpose this image and
save it as an IRIS RGB file (with the extension ".rgb").
Writeply is good for writing out the ClipMesh (see below). This is
particularly useful if you want to revisit a particular portion of a
large mesh. To do so, type "writeply ClipMesh name.ply". Writeply
will write out a multi-resolution version if applicable.
Graphical interaction
The GUI consists of the usual Tk windows and a special Tk widget
wrapped around an OpenGL graphics window.
The rendering window
The rendering window supports a number of direct manipulation
operations.
Rotations
The left mouse button gives trackball rotation. Holding down the
shift key permits rotation about orthogonal axes.
Translations
The middle mouse button gives translations in the (x-y) viewing plane.
The right mouse button gives translations in z.
Lighting
Holding down the Control button while dragging with left mouse button
controls the directional lighting in a trackball fashion.
Clipping rectangle
Holding down the Alt button while dragging with the right mouse button
allows you to draw a red clipping box onto the screen. See the notes
below on clipping.
Side buttons
The buttons in the window to the left of the main window are used to
control viewing and manipulation. The diamond shaped buttons select
whether the viewer or a particular mesh is being manipulated. The
square buttons control whether or not a mesh is visible.
Bottom buttons
Most of the radio buttons and check boxes that appear below the
graphics window are fairly self explanatory, or their purposes can be
discovered easily through experimentation.
Clipping
The least obvious buttons pertain to clipping meshes. Once you've
defined a clipping rectangle (see above), you can clip all triangles
outside of this rectangle with the "Do Clip" button. This will copy
the portion you selected to the "ClipMesh" without actually altering
the original polygon set. At the same time, it toggles the visibility
of the mesh being clipped. "Do Clip" requires that only one mesh be
visible at a time. The "Clear Clip" button will clear the overlay.
Use the "Full Clip" button when you want to actually clip away
polygons from the meshes. "Full Clip" will apply to any and all
meshes currently viewable. Sadly, "Full Clip" is a little buggy and
will crash without warning - work in progress. I will eventually
change all of this terminology to something a little more intuitive.
